


Lateral Ankle Sprain: How to Apply Kinesiology Tape (Step-by-Step)
One wrong plant off a cut. A missed step off a curb. A rogue tree root mid-trail. You know the moment — the ankle rolls outward, pain shoots up your leg, and you're suddenly doing the one-legged hop-limp to the sideline wondering whether you'll finish the game or spend the next week on the couch with ice strapped to your foot.
Lateral ankle sprains are the most common musculoskeletal injury in sport and active recreation. In the United States alone, an estimated 2 million ankle sprains occur every year — accounting for roughly 40% of all sports injuries. Basketball, soccer, trail running, volleyball, and tennis are the repeat offenders. But honestly, they happen to non-athletes just as often: walking on uneven ground, wearing the wrong shoes, or simply not paying attention.
Kinesiology tape won't fix a torn ligament. But applied correctly, it can reduce pain and swelling, restore proprioception, and help you move again — faster than just resting and hoping for the best. This guide covers the anatomy, the evidence, and a complete step-by-step taping technique you can actually use.
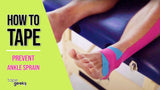
Quick Answer: How to Tape a Lateral Ankle Sprain
Start with anchor strips around the lower calf. Apply two stirrup strips from inner to outer ankle with 50% stretch for lateral support. Add a heel lock strip to limit inversion. Finish with a figure-8 to compress and stabilize. Keep foot at 90 degrees throughout. Tape stays on 3–5 days.
What Is a Lateral Ankle Sprain?
A lateral ankle sprain happens when the foot rolls inward (inversion) while the leg continues forward or in the opposite direction. This sudden twist overstretches or tears the ligaments on the outer side of the ankle.
Three ligaments are involved, in order of how often they get damaged:
- ATFL (Anterior Talofibular Ligament) — The most commonly injured. Runs from the fibula to the talus bone. It resists inversion when the foot is plantarflexed (pointing down). Nearly every lateral ankle sprain involves the ATFL.
- CFL (Calcaneofibular Ligament) — Runs from the fibula down to the heel bone. Injured in moderate to severe sprains. Provides stability across both the subtalar and ankle joints.
- PTFL (Posterior Talofibular Ligament) — The strongest of the three. Only damaged in severe dislocations or Grade III sprains. Rarely affected in typical ankle rolls.
Grading the Injury
Not all ankle sprains are equal. Clinicians grade them I through III based on ligament damage and functional loss:
- Grade I (Mild): Microscopic ligament tears, mild swelling, minimal pain with weight-bearing, no joint instability. You can probably walk — just not comfortably. Taping is appropriate immediately.
- Grade II (Moderate): Partial ligament tear. Moderate swelling, bruising, pain with weight-bearing, some joint instability. Taping can be helpful but may need a few days of RICE first.
- Grade III (Severe): Complete ligament rupture. Significant swelling and bruising, inability to bear weight, clear joint instability. This grade needs medical evaluation — ideally an X-ray to rule out fracture, and a physiotherapist to guide rehab. Kinesiology tape alone is not sufficient management.
When to See a Doctor First
If you can't put any weight on your foot, if the pain is centered over bone (not soft tissue), or if the ankle looks visibly displaced — stop. See a doctor before taping. Kinesiology tape is a recovery and support tool, not a substitute for diagnosis. The Ottawa Ankle Rules are a reliable field test: if there's bone tenderness along the posterior fibula or fifth metatarsal base, get an X-ray.
Does Kinesiology Tape Actually Work for Ankle Sprains?
Short answer: yes, for specific things — and no for others. Here's the honest breakdown.
What the research supports:
- Proprioception improvement: This is where kinesiology tape genuinely shines. The tape stimulates cutaneous mechanoreceptors — sensory receptors in your skin — which improves the brain's awareness of ankle position. Multiple studies, including a 2018 review in the Journal of Athletic Training, have found significant proprioception gains with kinesiology tape on unstable ankles. This matters for re-injury prevention.
- Pain reduction: The lifting effect of properly applied tape creates space in the subcutaneous tissue, which reduces pressure on pain receptors (nociceptors) and promotes circulation. Athletes consistently report decreased pain during movement.
- Swelling reduction: The mechanical lift encourages lymphatic drainage in the acute phase. A fan-cut lymphatic strip over the injury site can accelerate fluid clearance.
- Return to sport faster: A 2014 systematic review found that athletes with acute ankle sprains who used kinesiology tape returned to full activity sooner than those using no external support.
What kinesiology tape cannot do: It won't replace a torn ligament. It provides less rigid mechanical support than athletic (rigid) tape or an ankle brace. For Grade III sprains or serious instability, you need more than elastic tape.
TapeGeeks Take: We recommend kinesiology tape for Grade I and II sprains — especially in the sub-acute phase (days 2–7) once the initial inflammation has peaked. During the acute phase (first 24–48 hours), focus on RICE. Then tape for proprioception, pain management, and movement support.
What You'll Need
- Kinesiology tape — 5 cm (2-inch) width is standard for ankles. Pre-cut rolls or pre-cut strips both work. (TapeGeeks Kinesiology Tape)
- Scissors — to round the corners (prevents peeling)
- Clean, dry skin — no lotions, oils, or sweat on the application area. Tape adheres best to skin that's been wiped with isopropyl alcohol and dried for 30 seconds.
- A chair or surface to sit on — you need the foot at 90 degrees (neutral dorsiflexion), not pointed down
- Skin prep spray or pre-wrap (optional) — useful for hairy skin or if you sweat heavily during sport
How to Apply Kinesiology Tape for Lateral Ankle Sprain
Starting position: Sit with your foot hanging off the edge of a chair. Keep your ankle at 90 degrees (neutral) throughout the entire application — foot should be neither pointed nor flexed. This is non-negotiable. If you tape with the foot pointed down, the tape won't hold the ankle in the right position when you stand and walk.
Step 1 — Anchor Strips
Cut two strips of tape approximately 20–25 cm (8–10 inches) long. Apply them horizontally around the lower calf, about 10–12 cm (4 inches) above the ankle joint. Apply with 0% stretch — just lay them flat. These are your anchors; everything else attaches here. Round the corners to prevent peeling at the edges.
Pro tip: Always leave 2–3 cm of unstretched tape at each end of every strip. Stretched ends peel quickly. The anchor and end zones should always go down with no tension.
Step 2 — Stirrup Strips (Lateral Support)
This is the core of the technique. Stirrup strips run vertically from the anchor on the inner leg, under the heel, and up to the anchor on the outer leg — creating a sling that resists the inversion motion that caused the sprain.
- Cut a strip long enough to go from your inner calf anchor, under the heel, and up to the outer calf anchor — roughly 40–50 cm (16–20 inches) depending on foot size.
- Start on the medial (inner) side of the lower calf at the anchor, with 0% stretch for the first 2–3 cm.
- Pull the tape under the heel and up the lateral (outer) side of the ankle and lower leg with 50% stretch through the mid-section. This is where the support comes from — the stretch creates a mechanical resistance to inversion.
- Finish with 0% stretch at the lateral anchor end and rub the tape firmly to activate the adhesive.
- Apply a second stirrup strip slightly overlapping the first (about 1 cm offset), following the same path. Two stirrup strips provide substantially more stability than one.
Step 3 — Heel Lock Strip
The heel lock limits subtalar inversion and keeps the calcaneus (heel bone) from rolling outward. This is especially important if the CFL (calcaneofibular ligament) is involved.
- Cut a strip approximately 30–35 cm long.
- Start on the lateral side of the lower calf anchor, 0% stretch for the first few cm.
- Wrap the tape around the back of the heel, pulling across from lateral to medial with 25–50% stretch as it crosses the heel.
- Continue the strip up the medial side of the ankle and attach to the anchor strips without stretch at the end.
Step 4 — Figure-8 Strip (Additional Stability)
The figure-8 wraps around both the ankle joint and the forefoot to compress and provide multidirectional support. It's particularly useful for athletes returning to sport or for anyone with chronic ankle instability.
- Start at the lateral ankle anchor with 0% stretch.
- Wrap the tape across the top of the foot diagonally toward the inner arch, then under the foot and back up across the top of the foot to the outer side — forming the lower loop of the figure-8.
- Continue the tape around the back of the ankle, crossing the Achilles area, and back around to the starting point to complete the upper loop.
- Apply 25–50% stretch through the active sections. Finish with 0% stretch and rub well.
Step 5 — Closing Strips
Add one or two horizontal closing strips over the stirrup strips, working from bottom to top, with 0% stretch. These hold everything in place and compress the tape job. Do not apply these too tightly — you should be able to slip a finger under them comfortably. Circulation needs to remain unobstructed.
Circulation Check
After applying, wiggle your toes. If they tingle, go numb, or turn blue — remove the tape immediately and reapply with less tension. Kinesiology tape should feel snug and supportive, never constrictive.
Prevention Taping: Different Approach for Return to Sport
Prevention taping — used when the ankle has healed but you're returning to sport — is simpler than acute-injury taping. You're not managing swelling or severe pain. You're training proprioception and giving the nervous system a feedback edge during high-risk movements.
For prevention taping:
- Use lower tension overall — 25% stretch on most strips. The goal is proprioceptive feedback, not mechanical bracing.
- A Y-strip or I-strip from the lateral ankle up the lower leg activates the peroneal muscles, which fire to resist inversion.
- Add a single stirrup strip as a reminder cue — not for rigid support but to signal to the joint that the movement boundary is near.
- Apply 45–60 minutes before activity for best adhesion. The heat from your body activates the adhesive fully.
- Prevention taping pairs best with ankle strengthening and balance work — tape alone won't prevent re-injury if the supporting musculature is still weak.
Research from the British Journal of Sports Medicine found that athletes with a previous ankle sprain had a 70% reduction in re-sprain rate when using external ankle support (including kinesiology tape) alongside targeted balance training. Either alone was less effective than both together.
How Long to Leave the Tape On
Kinesiology tape on the ankle typically stays on 3 to 5 days per application, depending on:
- Activity level — heavy sweating or repeated water exposure shortens tape life
- Skin type — oily skin holds tape less well than dry skin
- Tape quality — a higher-quality tape with better adhesive will hold significantly longer
You can shower and swim with kinesiology tape. Pat it dry rather than rubbing — rubbing weakens the adhesive. If the edges start to peel, you can trim them or add a small strip of regular athletic tape over the lifted edge.
How to Remove It Without Tearing Your Skin
- Apply baby oil or coconut oil to the tape 5–10 minutes before removal — it breaks down the adhesive gently.
- Pull the tape back on itself at a low angle (parallel to the skin, not straight up). Pulling up tears skin. Pulling back rolls the adhesive off cleanly.
- Use your other hand to press the skin away from the tape as you pull — this prevents shear stress on the skin.
- Remove slowly. There's no prize for speed here.
- If you have sensitive skin or the tape has been on more than 5 days, do the removal in a warm shower — the heat and water loosen the adhesive significantly.
How to Prevent Future Ankle Sprains
Once is bad luck. Twice starts to be a pattern. If you've sprained the same ankle more than once, you likely have some degree of chronic ankle instability (CAI) — a condition where the ligaments don't fully recover mechanical stiffness and the proprioceptive system becomes desensitized to joint position.
The three most evidence-backed approaches to prevention:
1. Peroneal Strengthening
The peroneal muscles on the outer lower leg are your primary dynamic ankle stabilizers. If they're weak or slow to react, the ATFL takes the hit instead. Build peroneal strength with:
- Resistance band eversion exercises — loop a band around the forefoot and push the foot outward against resistance, 3 x 15 reps daily
- Single-leg calf raises — progressing from flat ground to a decline surface
- Lateral band walks — a staple in athletic injury prevention programs
2. Balance and Proprioception Training
Your nervous system needs to relearn where the ankle is in space. This takes deliberate practice:
- Single-leg balance — start on a flat surface, progress to a foam pad or BOSU ball. 3 x 30–60 seconds per side.
- Eyes-closed balance — removing visual feedback forces the ankle and foot proprioceptors to do more work
- Single-leg squats and single-leg deadlifts — load the balance system through a full range of motion
- Star Excursion Balance Test (SEBT) as both an assessment tool and a training drill — reaching in eight directions on one leg
3. Footwear and Surface Awareness
Ankle sprains spike when athletes are fatigued, when surfaces are uneven, and when footwear doesn't match the activity. Trail runners need trail shoes with lateral grip and ankle collar support. Basketball players need court shoes with wider bases. Worn-out shoes with collapsed midsoles reduce proprioceptive feedback. Replace athletic footwear at 400–600 miles of use.
For related taping techniques in the lower limb, see our guide to kinesiology taping for heel pain — many of the anchor and figure-8 techniques overlap.
Frequently Asked Questions
Can I apply kinesiology tape immediately after an ankle sprain?
It depends on severity. For Grade I sprains, you can tape within the first 24 hours — the lymphatic lift technique can help reduce swelling immediately. For Grade II sprains, most clinicians recommend 24–48 hours of RICE first, then tape once the initial inflammatory response has stabilized. Never tape over broken skin, open wounds, or if you suspect a fracture.
How is kinesiology tape different from rigid athletic tape for ankle sprains?
Rigid athletic tape (white tape) locks the joint mechanically — it prevents movement. This is useful for high-contact sports like football where you want near-zero inversion risk. Kinesiology tape is elastic and stretches with your skin, allowing normal movement while reducing the extremes of motion and improving proprioception. Kinesiology tape is generally better tolerated for multi-day wear and is more comfortable during activities requiring full ankle range of motion, like running or yoga.
How much stretch should I apply when taping an ankle sprain?
Stirrup strips for lateral support: 50% stretch (pull to half of the tape's maximum stretch). Heel lock: 25–50%. Figure-8 and closing strips: 25%. Anchor and end zones: always 0%. More tension is not better — over-tensioned tape causes skin irritation and blisters, particularly around bony prominences like the malleolus.
Can I walk or exercise with kinesiology tape on a sprained ankle?
Yes — in fact, early controlled movement is preferred over complete immobilization for Grade I and II sprains. Modern sports medicine protocols favor "protected mobilization," and kinesiology tape facilitates exactly that. You should be able to walk with normal mechanics. If the tape causes your gait to become more awkward or painful, check the application or reduce tension.
Will kinesiology tape help with ankle swelling?
Yes, when applied with a lymphatic technique. Instead of a solid strip, use a fan cut — cut three to four thin strips from one end of the tape (leaving the base intact), and apply with the strips fanned out over the swollen area with 0% stretch. The mechanical lift promotes drainage through the lymphatic system. This works best in the first 72 hours post-injury when edema is most active.
How do I know if my ankle needs a brace instead of tape?
If you have significant joint instability (the ankle gives way during normal walking, not just cutting or jumping), a lace-up ankle brace provides more consistent mechanical support than tape alone. Tape degrades with sweat and activity; a brace does not. Many athletes use both — a brace as primary support plus kinesiology tape for proprioceptive feedback and muscle activation.
How long does it take to recover from a lateral ankle sprain?
Grade I: 1–2 weeks. Grade II: 3–6 weeks. Grade III: 8–12 weeks or longer, sometimes requiring surgical evaluation. These are estimates — recovery depends heavily on rehabilitation quality. Passive rest alone produces slower and less complete recovery than active rehab. Start proprioception and strengthening work as soon as you can bear weight without sharp pain.
Can I use kinesiology tape on my ankle every day long-term?
Yes, though daily long-term use should complement active rehabilitation, not replace it. If you find you can't function without tape after 8+ weeks, that's a sign the underlying proprioception and strength deficits haven't been addressed. Tape is a tool, not a crutch — use it while you build the ankle's capacity, then wean off as tolerated.
Bottom Line
A lateral ankle sprain is painful, frustrating, and — if managed poorly — sets you up for re-injury down the road. Kinesiology tape is one of the better tools in the recovery arsenal: it reduces pain, supports lymphatic drainage, and meaningfully improves proprioception. But it works best when you understand what it can and can't do.
Grade I or II sprain? Tape it right, keep moving within pain limits, and start rehab work as soon as possible. Grade III or can't bear weight? See a physio before reaching for the tape roll. And if you keep rolling the same ankle, the real fix is in your peroneal strength and balance training — not how tightly you tape.
Use the technique in this guide, give yourself time to heal properly, and you'll get back to doing what you were doing before the ankle decided to betray you.

Written by: Professor Geek (The Geek Educator)
Edited by: Greg Kowalczyk, CEO & Co-Founder, TapeGeeks Inc.
This guide is part of TapeGeeks' commitment to providing athletes with practical, evidence-based tools for recovery and performance.