


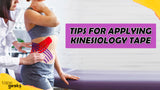

Kinesiology tape is one of the most popular non-invasive treatments for minor muscle injuries, sports recovery, and posture support. If you are planning to try it out for the first time, the process is straightforward — but getting the fundamentals right makes a significant difference in how long the tape lasts and how effective it is.
In this guide, we've compiled the 8 most important tips for applying kinesiology tape correctly, from skin preparation to safe removal — plus answers to the most commonly asked questions.

Shop our kinesiology tape now
Shop NowKinesiology tape is said to potentially reduce muscle pain and soreness by lifting the skin away from underlying tissue, improving circulation, and providing sensory feedback to the nervous system. Before applying kinesiology tape for the first time, it's crucial to familiarize yourself with proper application techniques.
Table of Contents

1. Precautions for kinesiology tape use
When applying kinesiology tape, do not apply to broken or damaged skin. If you have sensitive skin and it is your first time using kinesiology tape, perform a 24-hour skin test by first applying a small patch to the area you'd like to treat. If any skin irritation occurs, remove the tape right away.
Remove kinesiology tape if you notice any:
- Skin irritation
- Pain or discomfort
- Increased swelling
- Numbness
- Tingling of fingers or toes
- Severe itching
We do not recommend using kinesiology tape if you have any of the following medical conditions:
- Congestive heart failure
- Infection
- Renal insufficiency
- Deep Vein Thrombosis (DVT)
- Active Cancer
Who should use kinesiology tape with extra caution?
Certain groups should take additional care before beginning kinesiology taping:
- People with diabetes — Diabetic skin is more fragile and prone to poor healing. Perform a 24-hour patch test on a small area before full application. Monitor the skin closely for any signs of irritation.
- People taking blood thinners — The lifting action of kinesiology tape can occasionally cause minor skin bruising in patients on anticoagulant medication. Use lower tension and check skin daily.
- People with lymphedema — Kinesiology tape can be used therapeutically for lymphedema (particularly the fan/web cut), but it should be applied under the guidance of a lymphedema therapist.
- Children — Children's skin is more sensitive. Use a pediatric-safe tape formulation and avoid applying over bony prominences.
- Pregnant women — Kinesiology tape is generally safe during pregnancy (especially for lower back and pelvic support), but avoid taping over the abdomen without medical guidance.

Shop our bundles now
Shop Now2. Skin preparation prior to using kinesiology tape
Kinesiology tape directly interacts with the skin and its underlying structures. It also influences the neurosensory system, which carries pain signals to the brain. As you apply the tape, it acts as an extension of your skin — so proper preparation is essential for good adhesion and maximum wear time.
Here is a quick step-by-step guide to preparing the skin before taping:
- Clean the skin with hand sanitizer or rubbing alcohol. Make sure the area is oil-free and dry. Remove any lotion.
- If there is thick hair on the area you wish to tape, trim it to about 1/8" so it doesn't interfere with adhesion. It is not necessary to shave — just trim.
How to maximize kinesiology tape wear time
With the right preparation, kinesiology tape can stay on for 3–5 days. Here's how to get the most out of each application:
- Apply 30–45 minutes before activity — The heat-activated acrylic adhesive bonds more strongly when you allow time for it to fully adhere before sweating begins. Don't apply the tape right before jumping into the pool.
- Avoid moisturizers for 4–6 hours before taping — Lotion and skin oil are the #1 cause of premature tape peeling. Even one application of body lotion 2 hours before taping can halve the wear time.
- Use skin tac or adhesive spray on high-friction areas — Elbows, knees, and the edge of the shoulder benefit from a thin layer of adhesive spray applied to the skin before taping. This is especially helpful for very active applications (swimming, contact sports).
- Don't touch the adhesive — Skin oils from your fingers significantly reduce adhesion. Handle the tape by the backing paper only until it's on the skin.
- Rub the tape for 30 seconds after application — This activates the heat-sensitive adhesive. Always rub from the center outward — never from the ends toward the center.

3. Preparing your kinesiology tape
If you are using a kinesiology tape roll, round every corner when cutting the tape so the edges won't peel prematurely due to rubbing on clothing.

- Determine the number of pieces you need and your required length.
- Use sharp scissors to cut the tape.
- Round all the corners.
- Fold a couple of inches from one end and tear the backing paper.

Shop our scissors now
Shop NowAvoid touching the adhesive side when removing the backing. You can also purchase pre-cut rolls of kinesiology tape which simplifies the process — though not all pre-cut strips will be the right length for all applications.
Pre-cut vs. roll: which should you choose?
- Pre-cut strips — Convenient for common applications (shoulder, knee, ankle). Each strip is pre-shaped with rounded corners. Best for beginners or for body parts that match the standard strip dimensions.
- Roll tape — More versatile. Cut any length, shape, or cut type you need (Y, X, fan, donut). Essential for larger body parts (back, thigh, IT band) or non-standard applications. TapeGeeks rolls come in 5m and 10m options.
Get the best deals for Tape Geeks' products by visiting our Amazon store today!
4. Different types of kinesiology tape application
Kinesiology tape can be applied in various shapes, each with a specific purpose:

- Y shape. Often used to surround the target muscle. Must be 2" longer than the affected muscle. Used to cross sensitive areas such as behind the knee or in front of the elbow. Commonly used for kneecap (patellar) control.
- I shape. Used for acute injuries, alignment correction, and oedema. Used for muscle facilitation and inhibition. Commonly used for the rotator cuff, gluteus muscles, quadriceps, or Achilles tendon. Also used on the lower and middle back for posture support.
- X shape. Used when the origin and insertion of the affected muscle change on movement. Covers large body parts and crosses multiple joints. The tabs cross over sensitive areas like the backs of the knees and elbows. Commonly used for the hamstrings.
- Fan / Web. Used for oedema and lymphatic drainage. The web-shaped application reduces pressure in the target area and allows lymphatic fluid to drain through nearby lymph ducts. The ends remain intact; only the middle is cut into strips.
- Donut. Also used for oedema. Overlapping strips with the center cut out over the target area. Inhibits overused or stretched muscles.
Which tape cut should you use for your injury?
- Muscle strain or soreness → I-strip or Y-strip (Y for larger muscle groups like hamstrings and quads)
- Joint support (ankle, wrist, knee) → I-strip with 50–75% tension across the joint
- Postural support (shoulder, lower back) → I-strip with 25% tension along the spine or scapular muscles
- Swelling and bruising → Fan/web cut centered over the bruise or swollen area with 0% tension
- Decompression (carpal tunnel, IT band) → Multiple I-strips in a star pattern with 10–15% tension
- Kneecap tracking (patella) → Y-strip centered over the kneecap

When applying your kinesiology tape, below are some additional tips:
- Activate the tape. Since the tape uses a heat-activated acrylic adhesive, rub from the center toward the ends of each strip after application. Never rub from the ends toward the center.
- Use adhesive spray. Apply to areas prone to friction (edge of the shoulder, heel of the foot). The spray prevents the ends from lifting.
- Do not overstretch. If unsure how much to stretch, under-stretch rather than overstretch. Avoid stretching the ends (the last 2 inches on each side) — these are the anchors and should be applied with 0% tension.
Shop our bundles now
Shop Now5. Understanding kinesiology tape tension
Tension is the most important — and most misunderstood — variable in kinesiology taping. Applying too much tension can cause skin irritation and reduce effectiveness. Too little tension provides minimal therapeutic benefit.
Tension guidelines by application type:
- 0% tension (paper off) — The natural recoil of the tape with the paper removed. Used for anchors (the first and last 2 inches of any strip), lymphatic drainage, and decompression techniques.
- 10–25% tension (light) — Used for postural support, sensory feedback (proprioception), and decompression of tender or bruised areas. The tape forms visible waves (convolutions) on the skin — this is correct and indicates the lifting effect is working.
- 25–50% tension (moderate) — Used for muscle facilitation and inhibition. The most common tension for general injury taping.
- 50–75% tension (firm) — Used for acute joint support (ankle sprains, wrist sprains) where stability is the primary goal. Never apply this tension over open or irritated skin.
- 75–100% tension — Generally not recommended for kinesiology tape. If maximum stability is required, use rigid athletic tape instead.
How to check your tension is correct:
- At 0% (anchor) — the tape lies flat with no pull on the skin
- At 10–25% — the tape creates visible waves (convolutions) on the skin when the muscle is in a shortened position
- At 50–75% — the skin around the tape appears slightly lifted, with mild tension on the strip when the joint is in neutral position
6. Seek advice from a specialist
You can apply kinesiology tape on your own. However, if you are unsure about how to tape a certain body part or have questions about a specific injury, consult a specialist such as a sports medicine doctor, physiotherapist, or chiropractor.

When is professional kinesiology taping worth it?
Self-taping is suitable for most common applications (knee, ankle, shoulder, lower back). See a professional if:
- You've had a recent fracture, surgery, or significant ligament tear
- The taping involves a complex area (cervical spine, TFCC, pelvic floor)
- You've applied tape twice and it hasn't provided relief — you may be using the wrong cut or tension
- You have a skin condition (eczema, psoriasis, dermatitis) in the target area
- You are managing lymphedema — this requires a certified lymphedema therapist
Many physiotherapists and sports medicine clinics offer "tape check" appointments where they verify your technique and adjust your application. One session can significantly improve your self-taping results at home.
7. What to do when your tape gets wet
You do not have to worry about getting your tape wet. Kinesiology tape is water-resistant — you can shower, bathe, or even swim while wearing it. After activities that wet the tape, gently pat it dry with a towel. Allow the tape to air-dry for at least 20–30 minutes before doing other activities.
Do not use a hairdryer to dry kinesiology tape — heat above body temperature can melt the adhesive and cause skin irritation. If the tape starts to peel or roll back at the edges, trim the loose section with scissors rather than re-taping over it.

Kinesiology tape for swimming and water sports
Kinesiology tape works well for swimmers, open water athletes, and water polo players. For maximum adhesion in aquatic environments:
- Apply the tape at least 1 hour before getting in the water
- Use adhesive spray on the anchor ends before application
- After swimming, pat dry with a towel — don't rub
- Avoid touching or pulling the tape edges while wet — this is when the adhesive is most vulnerable
- Chlorinated water and salt water both degrade adhesive faster than fresh water — expect 2–3 days instead of 4–5 days in heavy aquatic use
8. Removing your tape safely
While many brands stress that kinesiology tape can be worn for several days at a time, we recommend wearing it for no longer than 3 days, with at least one day break between applications. This allows your skin to breathe and recover.
When it's time to remove, you can do it yourself at home. Follow these steps:
Remember: peel the skin away from the tape, not the tape away from the skin.
- Always remove in the same direction as the hair growth underneath
- Never rip the tape off quickly — peel slowly and steadily
- Fold the corners well before peeling
- Lay the removed tape flat on the back of the applied tape as you go
- Hold your skin down with your other hand (or tap it) while peeling
- If removing from a hairy area, press down on the tape as you peel — the pressure prevents hair pulling
- Apply oil (baby oil, coconut oil, or olive oil) on the tape and wait 10–20 minutes before removing — this breaks down the adhesive and makes removal painless
- Remove tape while showering — thoroughly wet tape peels off with minimal resistance
Take your time. Rushing kinesiology tape removal is the most common cause of skin irritation from taping.
9. What happens when kinesiology tape is applied incorrectly?
There is a proper application for kinesiology tape — various shapes and tensions have specific purposes. But what actually happens if the tape is misapplied?
The most common misconception is that incorrect application causes pain or damage. This is generally not the case. The worst outcome of misapplication is simply that you won't get the relief you need. If the tension is too high in the wrong direction, you may feel mild discomfort — remove the tape if that happens.

Most common kinesiology taping mistakes (and how to fix them)
- Too much tension on the anchors — The first and last 2 inches of every strip should be applied with zero tension. Tension on the anchors causes the skin to blister and the tape to peel within hours. Fix: always release the stretch before sticking down the ends.
- Applying over lotion or damp skin — Tape won't adhere properly. Fix: clean the skin with alcohol wipe, allow to dry completely, then apply.
- Wrong direction — Tape should generally be applied from insertion to origin (muscle-end to joint attachment) for inhibition, and origin to insertion for facilitation. If unsure, check a taping guide or ask a physio. A wrong direction will reduce effectiveness but rarely causes harm.
- Not rounding the corners — Square corners catch on clothing and peel off within hours. Fix: always use scissors to round all four corners of each strip.
- Stretching the tape too much — Excessive tension causes skin irritation and restricts movement. The tape should never feel tight at rest. Fix: aim for paper-off tension on anchors and 25–50% maximum for most applications.
Conclusion
We hope this guide answers your questions about kinesiology tape application. With the right preparation, tension, and technique, kinesiology tape is easy to apply and can provide meaningful support and pain relief for a wide range of injuries and conditions.
There are many resources available online showing taping protocols for specific body parts. Consulting a specialist is also a great way to learn proper technique for the areas you need to treat most.
You can apply kinesiology tape on your own — all you need is to follow the right tips and do your research. Kinesiology tape will provide you with the relief you deserve to continue your active lifestyle.

Shop our accessories and more
Shop NowSubscribe to the TapeGeeks Newsletter for new videos, discounts and more!Join The Geeks Club
Frequently Asked Questions About Kinesiology Tape Application
How long does kinesiology tape last?
Kinesiology tape typically lasts 3–5 days per application. With proper skin prep (clean, dry, oil-free and rounded corners), many users get the full 5 days. Heavy sweating, swimming, and high-friction areas reduce wear time. TapeGeeks recommends replacing tape every 3 days with at least one day off between applications.
Can you sleep with kinesiology tape on?
Yes — kinesiology tape is safe to wear while sleeping. It is flexible, breathable, and designed for extended continuous wear. Many protocols (posture, shoulder, lower back) are specifically intended for overnight wear. Remove immediately if you notice skin irritation or discomfort during the night.
Can you shower with kinesiology tape on?
Yes — kinesiology tape is water-resistant and can be worn in the shower, bath, or pool. After getting wet, pat dry with a towel (never rub) and allow 20–30 minutes of air-drying before resuming activity. Never use a hairdryer — heat above body temperature damages the adhesive.
Does kinesiology tape actually work?
Research shows consistent benefits for pain reduction and proprioceptive feedback. A 2015 meta-analysis in the Journal of Physiotherapy found kinesiology tape provided short-term pain relief comparable to other physiotherapy interventions. It works best as a complement to rehabilitation exercises. Athletes consistently report it helps manage pain and maintain activity during recovery.
How do I know if I applied kinesiology tape correctly?
Correctly applied tape should: (1) feel comfortable at rest with no pulling sensation, (2) show visible waves on the skin when the muscle is relaxed (for 10–25% tension), (3) have flat, smooth anchor ends, and (4) stay on for 2–3+ days without lifting. If tape feels tight, burns, or causes redness within the first hour, remove it — tension is too high or skin wasn't properly prepared.
What is the difference between kinesiology tape and athletic tape?
Kinesiology tape is elastic (stretches to 130–140% of its length), supports soft tissue, improves circulation, and allows full movement. Athletic tape (rigid tape) is non-elastic and restricts joint movement. Use kinesiology tape for ongoing injury management and recovery. Use rigid tape when joint immobilization is the priority (e.g., preventing a sprained ankle from rolling during sport).