


How to Tape Your Foot for Plantar Fasciitis: Step-by-Step Kinesiology Tape Guide

Written by: Professor Geek (The Geek Educator)
Edited by: Greg Kowalczyk, CEO & Co-Founder, TapeGeeks Inc.
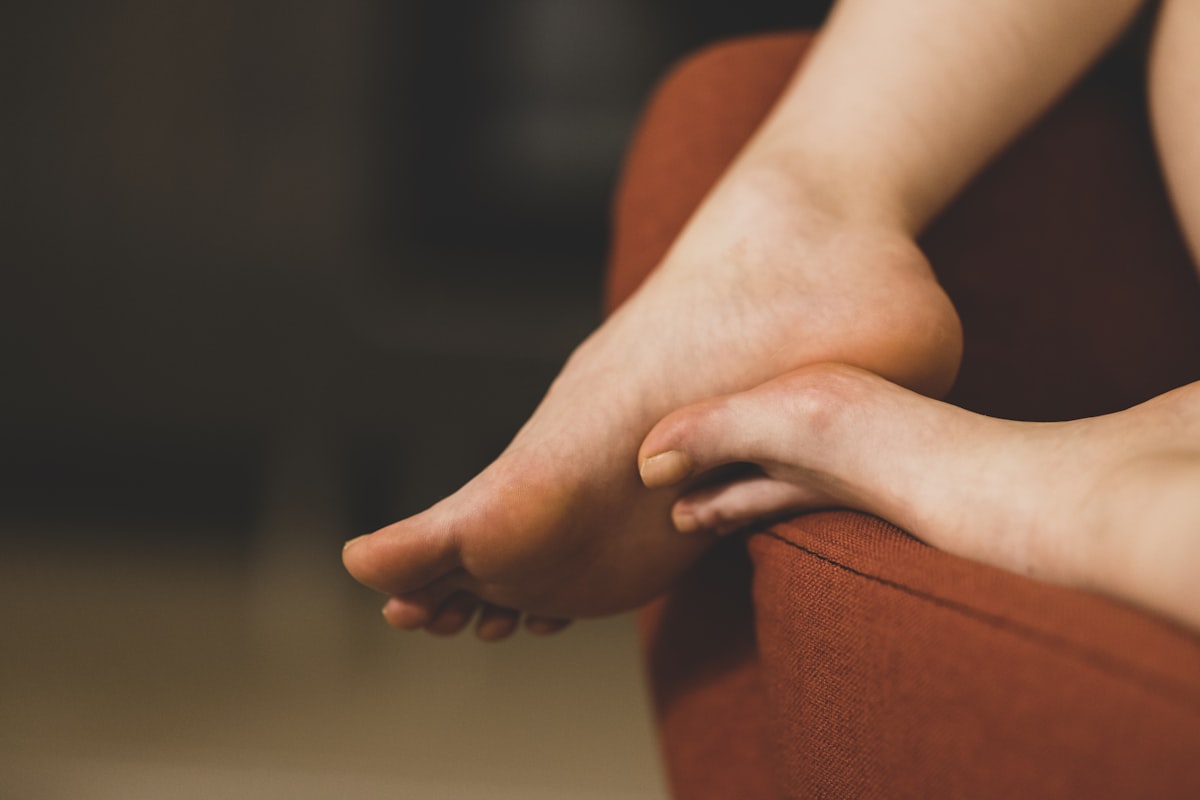
You know the feeling. First thing in the morning, before your feet even hit the floor, you already dread it — that sharp, stabbing pain in your heel the moment you stand up. It eases slightly after a few minutes of walking, but it's back the second you rest for more than an hour. That is plantar fasciitis. And if you are reading this, you are probably past the point of hoping it will just go away on its own.
Kinesiology taping is one of the most practical tools for managing plantar fasciitis pain during daily life and activity. It is not a cure, and any physio worth their credentials will tell you the same. But applied correctly, it offloads the plantar fascia, reduces pain on loading, and lets you keep moving while the underlying tissue heals. This guide walks you through the exact technique — the arch strip, the cross-support strip, tension levels, anchor rules — plus the complementary treatments that actually move the needle on recovery.
Quick Answer: How to Tape Your Foot for Plantar Fasciitis
- Clean and dry your foot completely.
- Dorsiflex your foot (toes pulled back toward your shin).
- Apply a 5 cm I-strip from heel to ball of foot with 50% tension. Zero tension on first and last 3–4 cm.
- Apply a cross-support strip perpendicular across the arch at 50% tension. Same anchor rule applies.
- Rub firmly to activate the adhesive. Leave on 3–5 days.
What Is Plantar Fasciitis?
The plantar fascia is a thick band of connective tissue that runs along the sole of your foot, connecting your heel bone (calcaneus) to the base of your toes. Its job is to act as a shock-absorbing bowstring — supporting your arch and absorbing load with every step.
Plantar fasciitis develops when repetitive stress causes micro-tears in that tissue, typically at or near the point where it attaches to the heel. The result is inflammation and pain — most pronounced in the first steps of the morning or after prolonged rest, because the fascia has tightened overnight and is then suddenly loaded.
It is one of the most common musculoskeletal complaints in clinical practice. Plantar fasciitis affects an estimated 3.6 to 7 percent of the population at some point in their lives and accounts for roughly 25 percent of all foot injuries seen by sports medicine clinicians. Runners, people who stand for extended periods, and individuals who have recently increased their activity load are the most frequently affected — though it shows up in desk workers and recreational walkers just as often.
The encouraging stat: approximately 90 percent of plantar fasciitis cases resolve within 6 months with consistent conservative care. The key word is consistent. Sporadic effort — taping once, stretching occasionally, ignoring footwear — rarely moves the needle.
Common Contributing Factors
- Tight calf muscles and Achilles tendon — increase tensile load through the plantar fascia
- Sudden increase in mileage or activity — the most common trigger in runners
- Flat feet or high arches — both alter how force is distributed across the fascia
- Worn-out footwear — loss of midsole cushioning removes a key line of defence
- Prolonged standing on hard surfaces — common in healthcare workers, teachers, retail staff
- BMI and load — higher body weight increases compressive force through the heel
Does Kinesiology Tape Work for Plantar Fasciitis?
Short answer: yes, for pain relief — with some caveats. Kinesiology tape is not going to rebuild the plantar fascia or address the root causes of your pain. But the evidence supporting its use for symptom management is reasonably solid, particularly for short-term pain reduction.
A 2014 randomised controlled trial published in Clinical Rehabilitation found that kinesiology taping significantly reduced pain at rest and during activity in participants with plantar fasciitis compared to a sham taping control. A 2019 systematic review in the Journal of Foot and Ankle Research examined multiple taping studies and concluded that both kinesiology tape and low-Dye athletic taping provide meaningful short-term pain reduction — with kinesiology tape showing additional benefits around perceived function and comfort.
A 2020 study in the Journal of Physical Therapy Science compared kinesiology taping against plantar fascia stretching alone and found that the combined approach (taping plus stretching) outperformed either intervention on its own for reducing morning pain at 4 weeks.
The proposed mechanisms are: (1) the tape creates a mechanical lift effect on the skin and soft tissue, reducing direct pressure on pain receptors; (2) it provides proprioceptive feedback that encourages better foot posture and offloads the heel; and (3) it may reduce shear forces on the fascia during the heel-strike phase of gait. There is ongoing debate about which mechanism contributes most — and honestly, the research has not fully resolved it. What is clear is that athletes and physios have been using kinesiology tape for plantar fasciitis for decades because it reliably reduces pain enough to let people function and train.
One caveat: If your pain is severe, constant (not just first-step), or has not improved at all after 6 weeks of conservative treatment, get a proper assessment. Plantar fasciitis can look similar to a heel stress fracture, nerve entrapment, or tarsal tunnel syndrome — all of which require different management. Tape is not a diagnostic tool.
For a deeper look at kinesiology taping and heel pain, see our guide: Kinesiology Taping for Heel Pain.
What You'll Need
- 5 cm (2-inch) kinesiology tape — TapeGeeks Kinesiology Tape works well here; elastic, skin-friendly, and holds through sweat
- Scissors — for cutting strips to length and rounding corners
- Clean, dry skin — wash with a non-moisturising soap. Lotions, sunscreen, and oils all compromise adhesion
- A chair or bench — to hold your foot in the correct position during application
- Optionally: skin preparation spray or pre-wrap — if you have sensitive or hairy skin
Pre-cut I-strips are the most convenient option. If you're cutting your own, always round the corners — square edges catch on socks and peel faster.
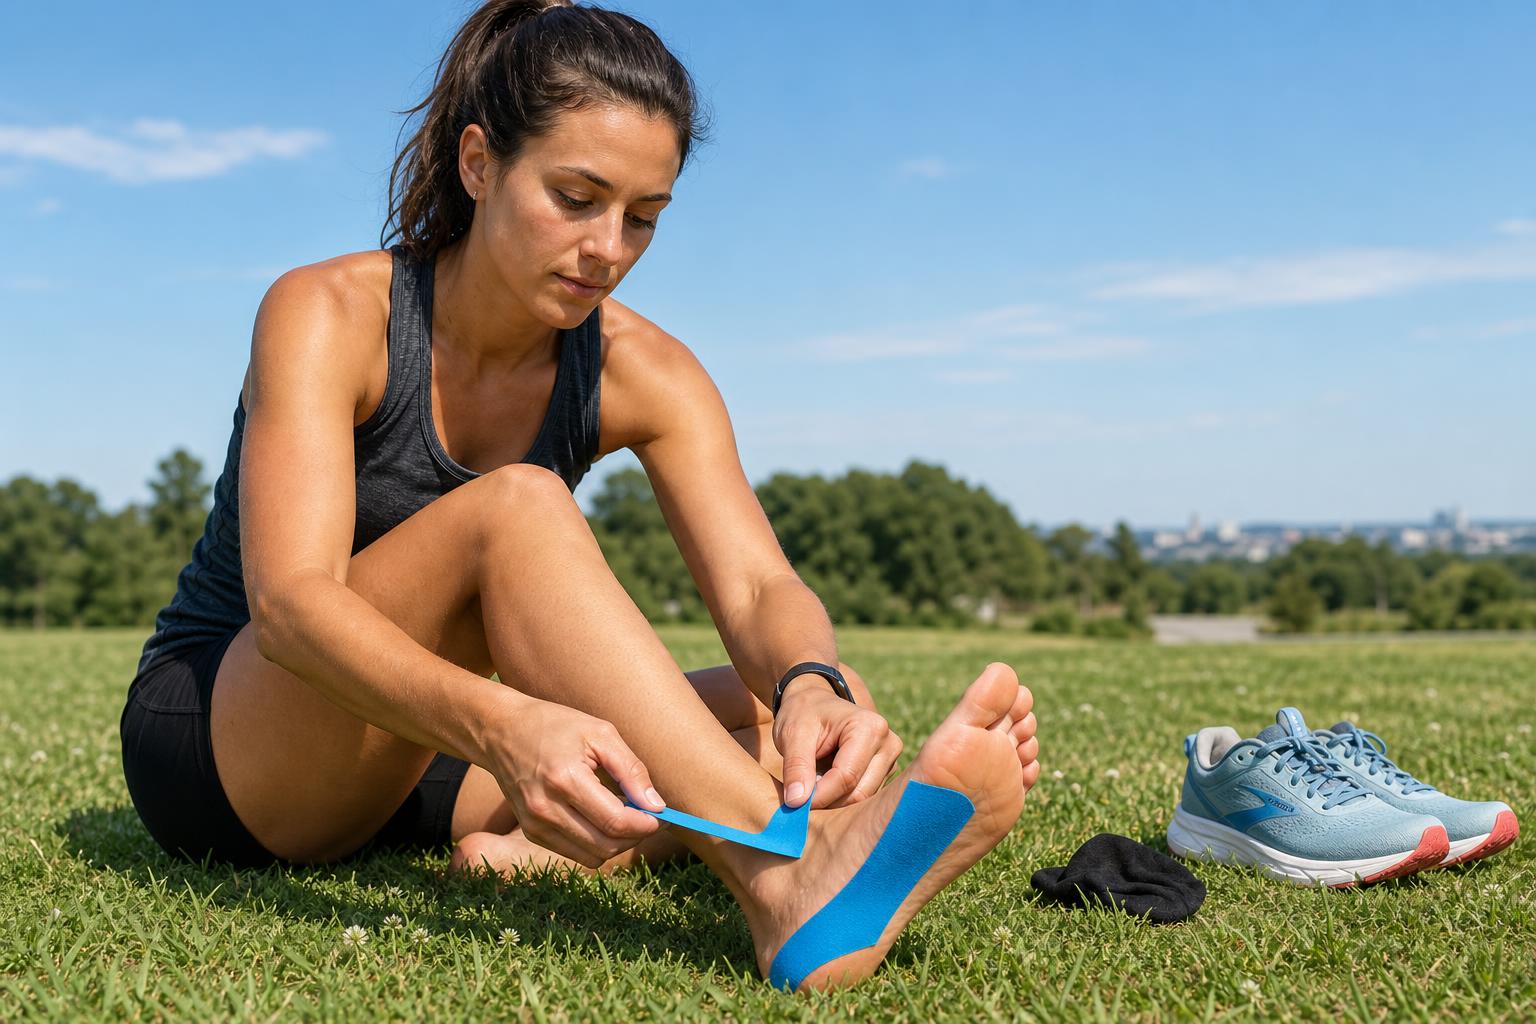
How to Tape Your Foot for Plantar Fasciitis — Step by Step
This technique uses two strips: a primary arch strip running heel to ball, and a cross-support strip running perpendicular across the mid-arch. Together they offload the plantar fascia from two directions. This is the pattern most commonly used by physiotherapists and sports coaches, and it is what the clinical studies on kinesiology taping for plantar fasciitis have generally tested.
The Anchor Rule — Non-Negotiable
The first and last 3–4 cm of every strip must be applied with zero tension. These are the anchor zones. Applying tension at the ends is the most common taping mistake — it creates a mechanical edge that lifts, causes skin irritation, and means the tape peels off within hours. Apply anchors flat, then add tension only through the middle section of the strip.
Preparation
- Wash your foot and dry it thoroughly — including between the toes and in the arch. Any moisture will compromise adhesion.
- Sit on a chair with your foot resting flat on the floor or on your opposite knee at a comfortable working height.
- Cut one I-strip approximately 20 cm (8 inches) long — enough to run from just below the heel to the ball of the foot. Round all corners with scissors.
- Cut a second, shorter strip approximately 12–15 cm long for the cross-support strip. Round corners.
Strip 1: Main Arch Strip (I-Strip)
- Dorsiflex your foot: Pull your toes back toward your shin so the plantar fascia is under slight stretch. Hold this position throughout the application of the first strip. If needed, have someone help, or loop a towel around your toes to keep them pulled back.
- Apply the heel anchor: Peel back the first 3–4 cm of the backing paper. Apply this anchor section directly under your heel, at the very bottom, with zero tension. Press firmly to bond.
- Apply the active section: Peel the remaining backing paper away while holding the tape taut. Apply the middle section of the strip along the length of your arch — from heel toward the ball of the foot — with approximately 50% tension. This means stretching the tape to about half of its maximum elongation. You should see a slight wave or gather in the tape when it is applied correctly.
- Apply the forefoot anchor: For the last 3–4 cm at the ball of your foot, release all tension and lay the tape flat with zero tension. Press down firmly.
- Rub the entire strip briskly with your palm for 10–15 seconds. The friction activates the heat-sensitive adhesive and improves bond strength significantly.
Strip 2: Cross-Support Strip
- Keep your foot dorsiflexed.
- Position the cross strip perpendicular to the first strip, running across the width of your mid-arch (roughly at the highest point of the arch).
- Apply the medial (inner) anchor — 3–4 cm on the inside edge of your foot — with zero tension.
- Apply the active middle section across the arch with 50% tension.
- Apply the lateral (outer) anchor — 3–4 cm on the outer edge of the foot — with zero tension.
- Rub the strip firmly to activate the adhesive.
Pro tip from physios: For moderate to severe flare-ups, you can add a second arch strip offset 1–2 cm from the first, slightly overlapping, to increase support. Some athletes and coaches use a three-strip fan application during high-load training periods. Start with the two-strip technique first — it covers most cases effectively.
How Long to Leave the Tape On — and How to Remove It
Kinesiology tape can stay on for 3 to 5 days. Unlike athletic or zinc oxide tape, it is designed for multi-day wear — the elastic backing and water-resistant adhesive allow showering, light swimming, and training without removal.
Remove sooner if:
- The edges lift significantly (re-taping may be needed earlier in humid conditions)
- Skin becomes red, itchy, or irritated under the tape
- The tape gets wet and cannot fully dry — prolonged moisture under the tape softens skin
Removal Tips
- Peel slowly in the direction of hair growth — never rip kinesiology tape off quickly like a bandage
- In the shower works well — warm water loosens the adhesive and makes removal less uncomfortable
- Hold skin taut with one hand while peeling back with the other — this prevents skin stretching
- Baby oil or coconut oil can be applied to stubborn adhesive residue after removal
- Give skin at least 1–2 hours of rest before re-taping to allow it to recover
Complementary Treatments That Support Recovery
Taping is a management tool, not a solution on its own. The athletes who recover fastest from plantar fasciitis are the ones combining taping with a short list of interventions that have the strongest evidence base.
1. Plantar Fascia and Calf Stretching
This is the single most important thing you can do alongside taping. Two stretches in particular:
- Plantar fascia stretch: Sitting or standing, pull your toes back toward your shin, hold for 30 seconds, repeat 3 times. Do this before your first steps in the morning — it warms the fascia before it is loaded. A 2003 study in Clinical Orthopaedics and Related Research found this stretch more effective than Achilles stretching alone for symptom resolution at 8 weeks.
- Standing calf stretch (two variations): (a) Straight-knee version against a wall targets the gastrocnemius; (b) bent-knee version targets the soleus. Both need to be addressed. Tight calves directly increase tensile load on the plantar fascia. Three sets of 30 seconds, twice daily, is the standard physiotherapy prescription.
2. Footwear Assessment
Worn-out running shoes are a leading contributor to plantar fasciitis flare-ups. The midsole of a running shoe degrades significantly after 500–700 km, even if the outer sole still looks intact. If you cannot remember when you last replaced your shoes, they are probably past their useful life. Look for footwear with firm heel counters, adequate arch support, and a modest heel-to-toe drop (8–12 mm is a reasonable starting range for most plantar fasciitis sufferers).
Avoid walking barefoot on hard floors first thing in the morning — keep supportive sandals or shoes at the bedside. This one change alone reduces that brutal first-step pain for many people.
3. Arch Supports and Orthotics
Over-the-counter prefabricated insoles with firm arch support reduce strain on the plantar fascia and complement taping well. Research published in the British Journal of Sports Medicine found prefabricated orthotics as effective as custom orthotics for plantar fasciitis in most non-elite athletes — a meaningful finding given the cost difference. Custom orthotics remain the right choice for complex biomechanical issues or cases not responding to conservative care.
4. Night Splints
Night splints hold the foot in a dorsiflexed position while you sleep, preventing the fascia from tightening overnight. This directly targets that characteristic morning first-step pain. They take a few nights to get used to, but the evidence supporting their use for chronic plantar fasciitis (symptoms lasting more than 6 months) is solid. Many physios recommend them as an add-on when stretching and taping alone are not producing results fast enough.
5. Load Management
If you are a runner, reduce your weekly mileage by 20–30% during a flare-up. Swap some runs for cycling or swimming — both maintain cardiovascular fitness without the repetitive heel-strike load. Cross-training is not defeat; it is recovery strategy.
For more on managing foot pain with kinesiology tape, see our guide on lateral ankle taping — many of the same application principles apply.
Markham runner note: when heel pain needs a local assessment
Short answer: tape can make walking, work shifts, and easy runs more tolerable, but recurring plantar fasciitis still needs a professional look when it changes your stride or keeps coming back.
For Markham and York Region runners, walkers, court-sport athletes, and gym-goers, use TapeGeeks kinesiology tape as the support layer. If heel pain persists after consistent stretching, footwear changes, and load reduction, compare local sports physiotherapy, chiropractic, athletic therapy, and sports medicine options in SportClinicFinder's Markham plantar fasciitis clinic guide.
When Taping Is Not Enough — See a Physio
Most plantar fasciitis responds well to the protocol above. But there are situations where taping and home stretching are not the right primary tools:
- Pain that is constant — not just first-step pain, but pain throughout the day and at rest
- No improvement after 6–8 weeks of consistent conservative care
- Pain that has changed in character — from a familiar dull ache to a sharp or burning sensation, which can indicate nerve involvement
- Swelling, bruising, or tenderness along the top of the foot — these are not plantar fasciitis signs and warrant imaging
- Bilateral plantar heel pain — pain in both heels simultaneously can sometimes indicate a systemic inflammatory condition
A physiotherapist or sports medicine physician can provide a proper gait assessment, rule out differential diagnoses, and introduce escalated treatments like shockwave therapy, corticosteroid injection, or platelet-rich plasma (PRP) if conservative measures have stalled.
Frequently Asked Questions
Bottom Line
Plantar fasciitis is frustrating, but it is manageable. Kinesiology tape applied correctly — I-strip along the arch at 50% tension, cross-support strip perpendicular, zero tension on all anchors, foot dorsiflexed throughout — provides real, evidence-backed pain relief that lets you keep moving while the tissue heals. Add consistent daily stretching, fix your footwear, and you have the core of a recovery plan that works for 90 percent of cases.
The tape is one piece of the puzzle. Use it well.
This guide is part of TapeGeeks' commitment to providing athletes with practical, evidence-based tools for recovery and performance.